Live Transcripts
Live Transcripts (Close Captioning) are now available for your meetings.
Enable Zoom Live Transcripts
- Log in to Zoom via https://caltech.zoom.us/
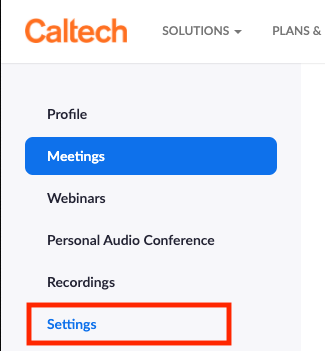
- On the left menu, click On Settings

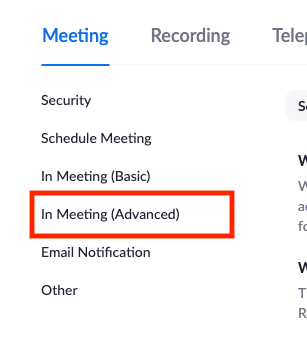
3. In the Meeting tab select In Meeting (Advanced)

4. Go to the Closed Captioning section and enable this feature. A prompt will pop up, click Turn On.

Image Lightbox
5. A new check box for Allow live transcription service to transcribe meeting automatically will appear. Enable this feature and click Save.
Start Live Automatic Transcriptions During a Meeting or Webinar
Only the meeting host can turn auto transcriptions on or off.
- Once the meeting has started, click the Live Transcript button in the Zoom control bar. Click Enable Auto-Transcription.

Image Lightbox
2. The meeting host will see the transcripts at the bottom of the Zoom meeting video.
3. A new set of options will be available for host and attendees by clicking the small arrow on the Live Transcript button. These options allow users to select how they wish to view the transcriptions/subtitles.

4. The Subtitle settings are:
- Show Subtitle - the transcript will appear as video subtitles at the bottom of the video frame.
- View Full Transcript - the transcript will appear in a side-panel Transcript window and the full transcript to that point may be saved by clicking Save Transcript. Host and attendees can also search the transcript by entering text into the Search transcript field at the top of the window.
- Subtitle Settings - participants can change the appearance of the subtitles.


